Cross-Chain Token (CCT) Tutorials
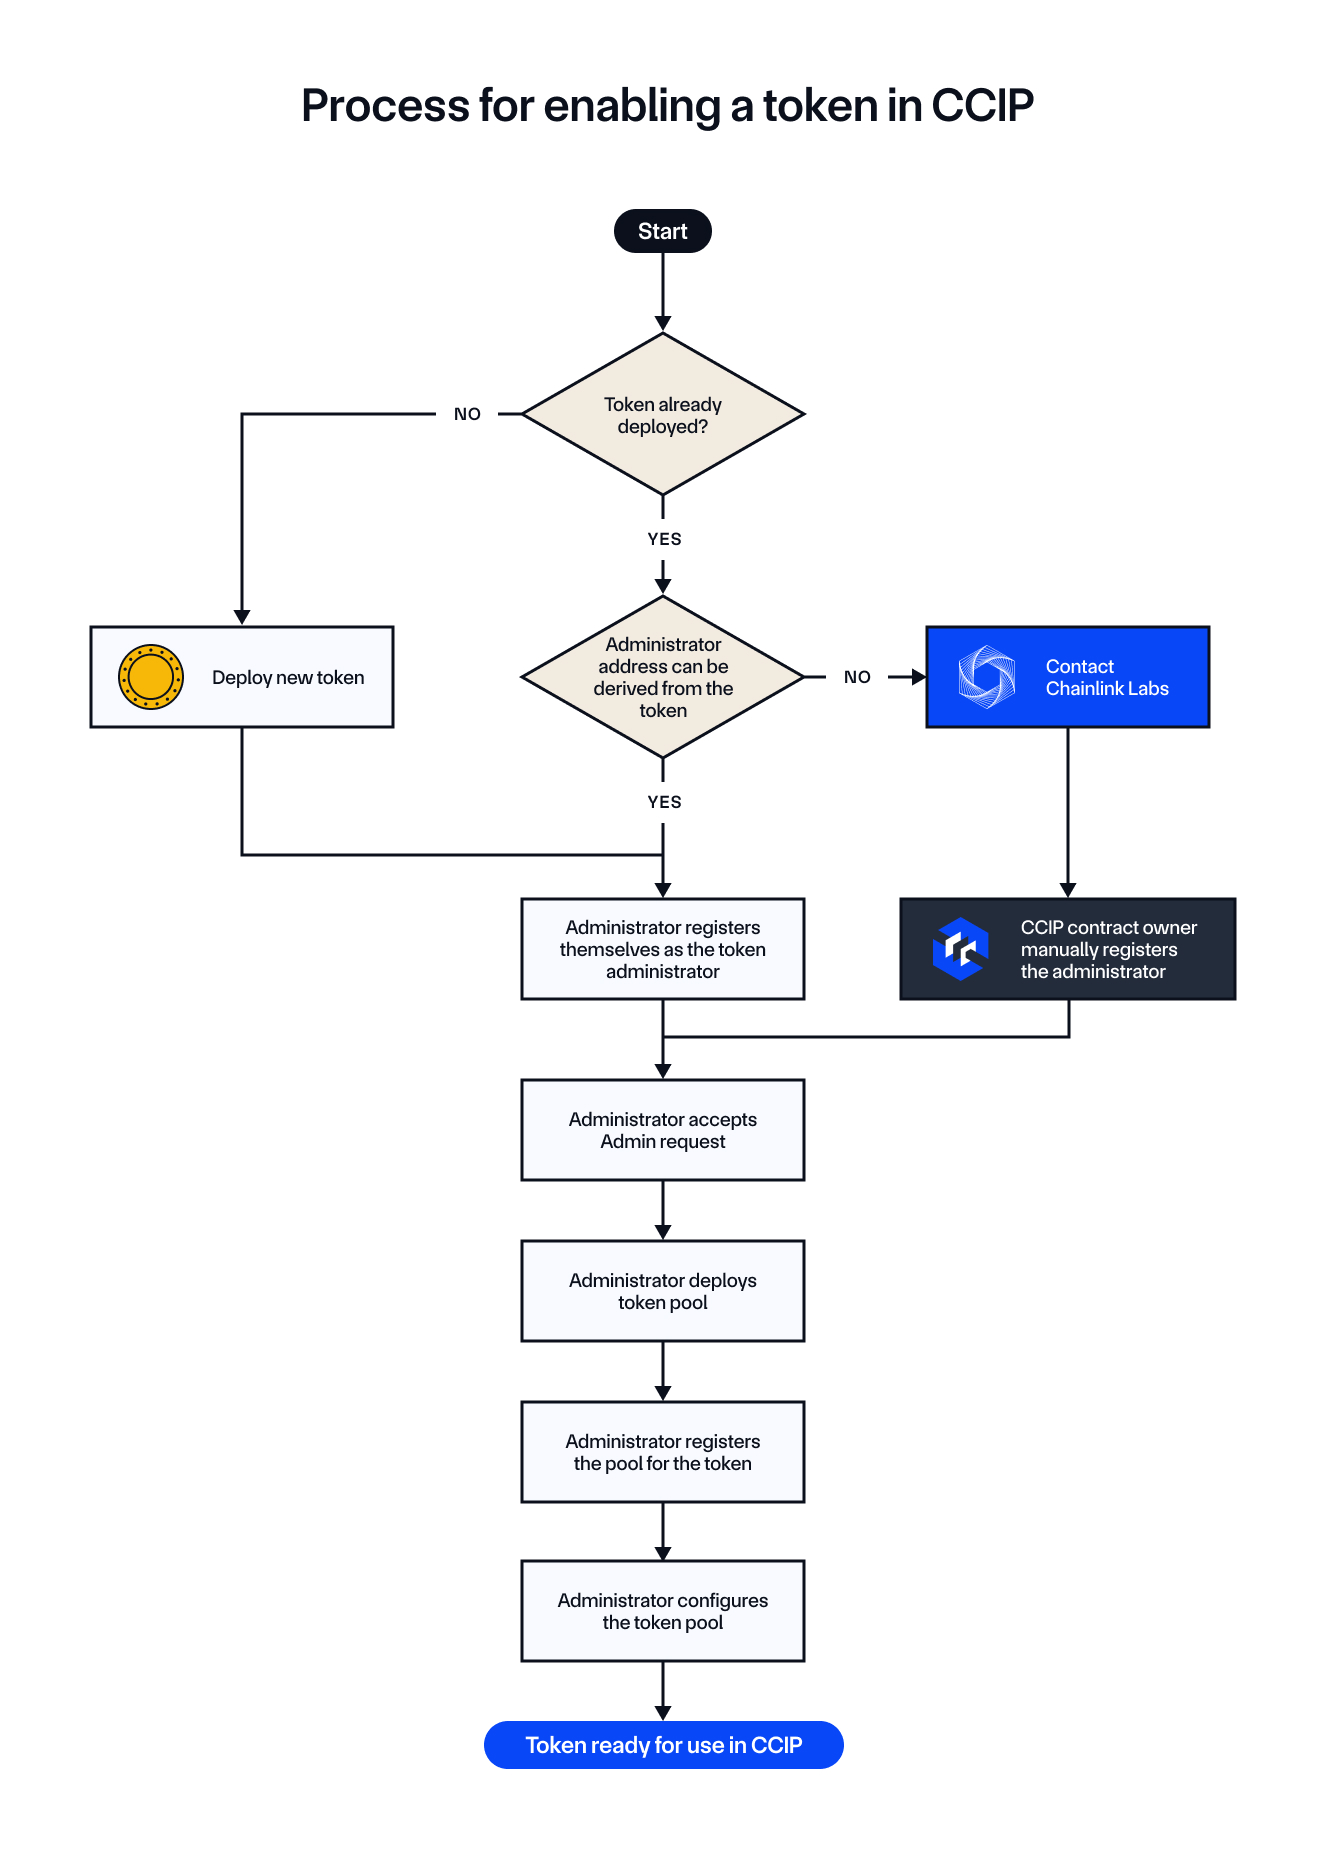
Before diving into the tutorials, it's important first to understand the overall procedure for enabling your tokens in CCIP. This procedure involves deploying tokens and token pools, registering administrative roles, and configuring token pools to enable secure token transfers using CCIP. The diagram below outlines the entire process:

Understanding the Procedure
The steps in the diagram highlight the flow of actions needed to enable a token for cross-chain transfers. These steps will be the foundation of the tutorials. Whether you're working with an Externally Owned Account (EOA) or a Smart Account (such as one using a multisig scheme), the overall logic remains the same. You'll follow the same process to enable cross-chain token transfers, configure pools, and register administrative roles.
In the following tutorials, we will walk through each step of the process to give you hands-on experience, from deploying your token to registering and configuring token pools. The process will apply equally whether you use an EOA or a Smart Account (such as with multisig transactions), ensuring flexibility across different account types.
Key Steps to Keep in Mind:
- Token Deployment: If the token is not yet deployed, you'll deploy an ERC20-compatible token.
- Admin Registration: The token administrator must be registered in the
TokenAdminRegistryvia self-service. - Pool Deployment and Configuration: Token pools are deployed, linked to tokens, and configured to manage cross-chain token transfers.
The tutorials will implement the logic of this process, which involves deploying and configuring token pools and registering administrative roles, step-by-step.
Tutorials
-
Register from an EOA (Burn & Mint): Learn how to register a cross-chain token with the Burn & Mint mechanism using an EOA.
-
Register from an EOA (Lock & Mint): Learn how to register a cross-chain token with the Lock & Mint mechanism using an EOA.
-
Set Token Pool Rate Limits: Learn how to set rate limits for token pools to control cross-chain token transfers.
-
Register from a Safe (Burn & Mint): Learn how to register a cross-chain token with the Burn & Mint mechanism using a Safe Smart Account.